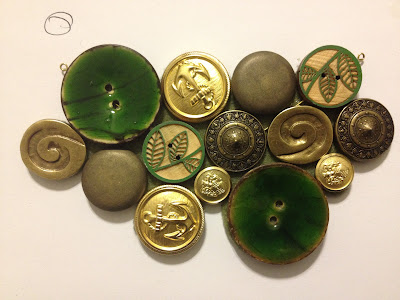
Materials:
- Assortment of Buttons
- Felt sheet (In a color that complements the buttons)
- Chain
- (4) Jump Rings
- (1) Lobster Clasp
- (2) Eye Head Pins
- Glue
- Hot Glue
- Paper
- Scissors
- Pencil
Instructions:
1) Lay out your buttons onto a piece of paper in the way you want them to appear on your necklace. If you use some buttons that don't have holes like I did, you'll need to cut the piece off the back that sticks out so it can lay flat. I did this with scissors...I recommend using some pliers or something...wire cutters...something other than scissors. You see how well that went for me lol.
2) Trace around the buttons onto the paper and then cutout what you traced. Lay your cutout onto a piece of felt and then trace the pattern onto the felt. Cut out what you traced. You should have something that looks like this.
3) Lay your buttons back onto the felt. If you see any pieces of the felt sticking out behind the buttons, cut it off. Once everything looks right, remove the buttons and glue on your two eye head pins. I used regular clear glue for this. Ignore those random squigglies lol.
4) After gluing on the eye head pins, I laid all my buttons back onto the felt in their proper place. I did this to make sure that as I was gluing, everything would be exactly where I wanted it to be. I just picked up one button at a time and glued it down. Also, with my necklace, you can see the eye head pins behind the buttons, which didn't bother me. However, if you want that to be hidden, just trace and cut another piece of felt into the same shape and glue the second piece on top of the felt with the eye pins.
6) Add two more jump rings and a lobster clasp to the ends of the chain for closure.
Aaaaaaaaand you're done!!!!
Back of necklace...
Front of necklace...
Now for the earrings, I bought another pack of those small gold ones you see in the necklace and I cut the back off.
I used the head of a screw driver to smash those rough parts in just by pressing firmly on them. Then I glued a flat pad earring post to the back with my glue gun. And that's really all there was to it.
Stay Inspired.


Super cute!
ReplyDeleteThanks Trices Pieces lol
Delete